Granite fabrication requires precision, skill, and the right tools to achieve accurate cuts and seamless finishes. Whether you are working on countertops, tiles, or other custom pieces, understanding the key principles behind cutting and finishing granite can help you achieve a professional result. One of the first steps in granite fabrication is measuring the surface accurately. Proper measurement is essential to ensure that the granite fits perfectly in the intended space. Use a high-quality tape measure and take multiple measurements to avoid errors. Templates can also be helpful in creating precise cuts, especially when working with complex shapes or curves. Once the measurements are accurate, the next crucial aspect is selecting the right tools for cutting granite. Granite is a dense, hard material, so it requires specialized equipment, such as a wet saw with a diamond blade. The water used during cutting helps keep the blade cool and reduces the amount of dust generated, which is vital for both safety and efficiency. When making cuts, ensure that the saw is set to the correct speed and angle to maintain a smooth and precise cut.
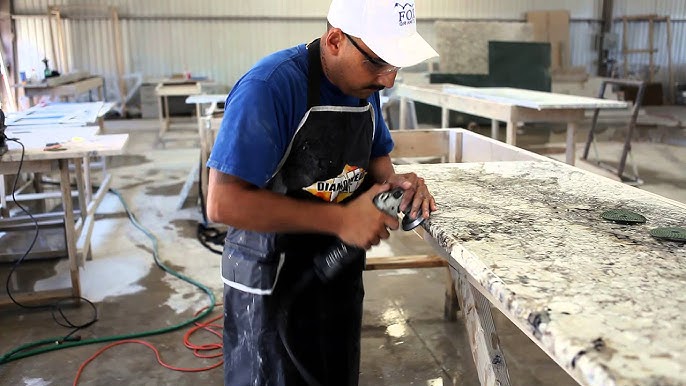
Take your time during the cutting process, as rushing can lead to jagged edges or mistakes. For clean and precise cuts, it is also important to consider the type of cut being made. Straight cuts are generally the easiest to execute, but if you need to make angled cuts or curves, special techniques such as using a guide rail or template are necessary. For curved cuts, a wet diamond blade with a slower speed is often recommended to ensure smoothness and minimize chipping. Additionally, the edges of the granite pieces should be finished to give them a polished and professional appearance. This can be done using an edge polishing machine or a handheld grinder, depending on the size of the piece. Seaming is another critical aspect of granite fabrication. When joining two granite pieces together, the seams must be perfectly aligned to achieve a seamless finish. A common method for achieving this is using a color-matched epoxy resin to bond the pieces together Visit Website to get more details. Before applying the epoxy, it is important to ensure the surfaces are clean and free of debris.
Once the epoxy is applied, clamp the pieces tightly together and wipe off any excess before it hardens. After the epoxy has dried, the seam can be sanded and polished to blend with the surrounding surface, creating a smooth, nearly invisible joint. Another tip for achieving a seamless finish is to use a polishing pad to refine the surface of the granite. This will remove any minor imperfections left after cutting and ensure a uniform shine. A good polishing process involves progressively finer grits, starting with a coarser pad and working your way up to a finer one. Be patient with this process, as it can take time to achieve the desired glossy finish. In addition to these tips, maintaining the tools in good condition is essential for consistent, high-quality results. Regularly clean the blades, saws, and polishing equipment to prevent the buildup of dust and resin, which can affect the performance of the tools. Proper maintenance of the equipment ensures smoother cuts and better finishes every time.